Do it yourself: We offer you 3 projects. Here are the beautiful DIY projects that you will have fun while you do and finally bring your home with wonderful accessories.
With DIY projects, you can distract yourself by staying away from stress. You can do great things with DIY projects that you can deal with, especially on weekends. In this way, you can create wonderful items and accessories for both fun and home. Here, we bring you creative and fun works with our topic of “Do It Yourself: 3 Projects”. You can choose one of them or make them all.
1. Cake stand

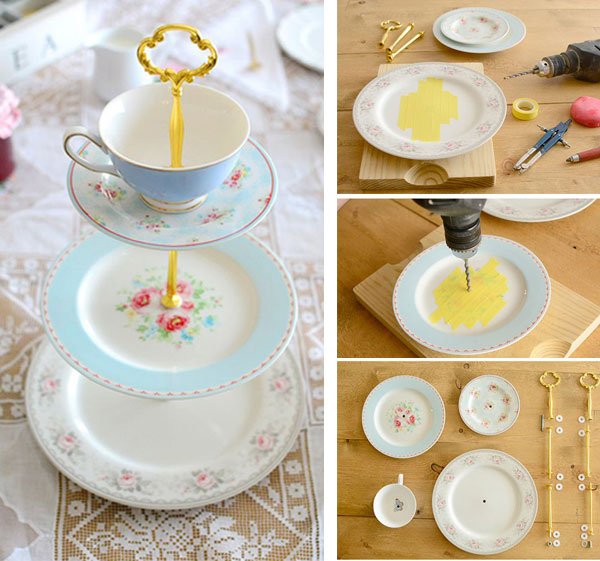
The first of the “DIY: 3 projects” is the cake stand… You can make a very stylish cake stand for your beautiful cakes. Making a unique stand like your cakes is actually extremely simple. 3 plates of different sizes as you need, 2 items that you can make columns, spray paint and porcelain glue. In this way, you can evaluate your plates and have a cake stand at a very low cost.
First, you can start by finding the 2 items that will form the pillars of your cake stand. For this, old candlesticks, drinking glasses or vases can work. Spray paint the column elements you find in a color of your choice and let them dry for 12 hours. Find the middle of the plates and glue the materials that will form the columns with porcelain glue. Here your new cake stand is ready.
2. Napkin rings

You can make napkin rings, which are complementary to a stylish table, according to your own taste. Second of the “DIY: 3 projects”, napkin rings… You can have napkin rings for a low cost and in suitable colors for your table decoration. Depleted foil roll, cloth, scissors, ribbon, utility knife, self-adhesive tape, ruler and glue, materials needed. You can also evaluate the fabric pieces you have. You can start by cutting the cardboard roll. You can decide the thickness of the napkin rings according to your taste. With a utility knife, carefully cut the roll to the same size. Cut the self-adhesive tapes in the same dimensions as the rolls you cut and stick them on the rolls. Cut fabric strips about twice the width of your roll. Cover your adhesive roll with fabric, starting in the middle. Apply fabric or any adhesive to the inside of your roll. Glue the outer parts of the fabric by carefully pushing them into the roll. Cut and glue a thick ribbon in the same size to hide the joints inside the roll. Make it adhere well with the help of a pencil.
3.Frame from the old arch

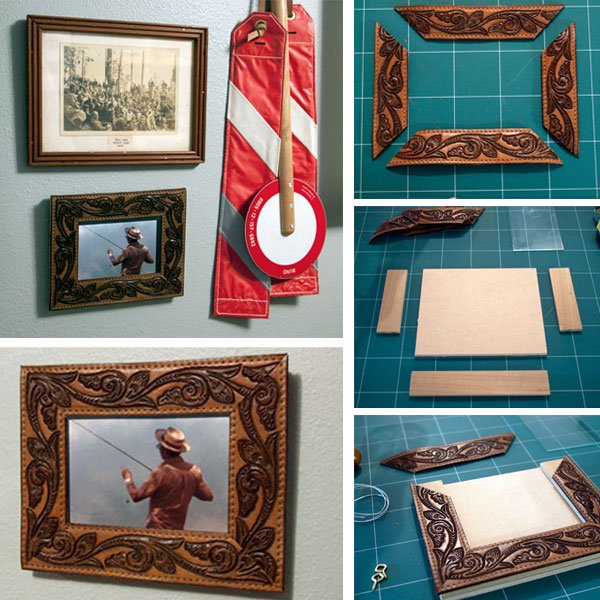
The last of the “DIY: 3 projects” is the photo frame… If you have an old arch, you can bring it back to life with this project. Especially vintage or cowboy-style belts can be great frames to decorate your photos. Cut the sides of the arch diagonally by determining the dimensions of your frame. Finish by gluing the four pieces from the arch to the edges of the frame. With the extremely simple DIY project, your wonderful frame is ready, you can place any photo you want.